Monday, April 21, 2014

Trending Tuesday - all about Moo's.

Tuesday, Tuesday, Tuesday!  It's Trending Tuesday over at the Altered Pages Blog.  I hope you are having fun seeing all of the work from the design team.  This Trending Tuesday is all about MOO's, or mini cards.  I am adding my moo's to the WIP "One Lump or Two" board book that I showed in an earlier post.    

This page is titled "Mama and Baby Moo".  It features the creepy cute baby doll heads, tiaras and my moos for the babies bodies.  I have added some bling, ephemera and a bit of lace as a veil.    


Here is the front cover of the board book. 


Collage sheets and tiaras getting ready for placement. 


I used my Art Anthology paints to finish out the tiara's


I hope you like it.  Make sure to check out all of the designers hard work.  And, as always, make sure to get all of your art and craft supplies at Altered Pages!!!


Here are links to just some of the supplies I used. 

Art Anthology Paints

Moo Collage Sheets

My Head is Spinning Collage Sheet

Arched Board Book

Crown Set from The Leaky Shed

Thursday, April 17, 2014


So, it's Friday again. Yes! Thank you!

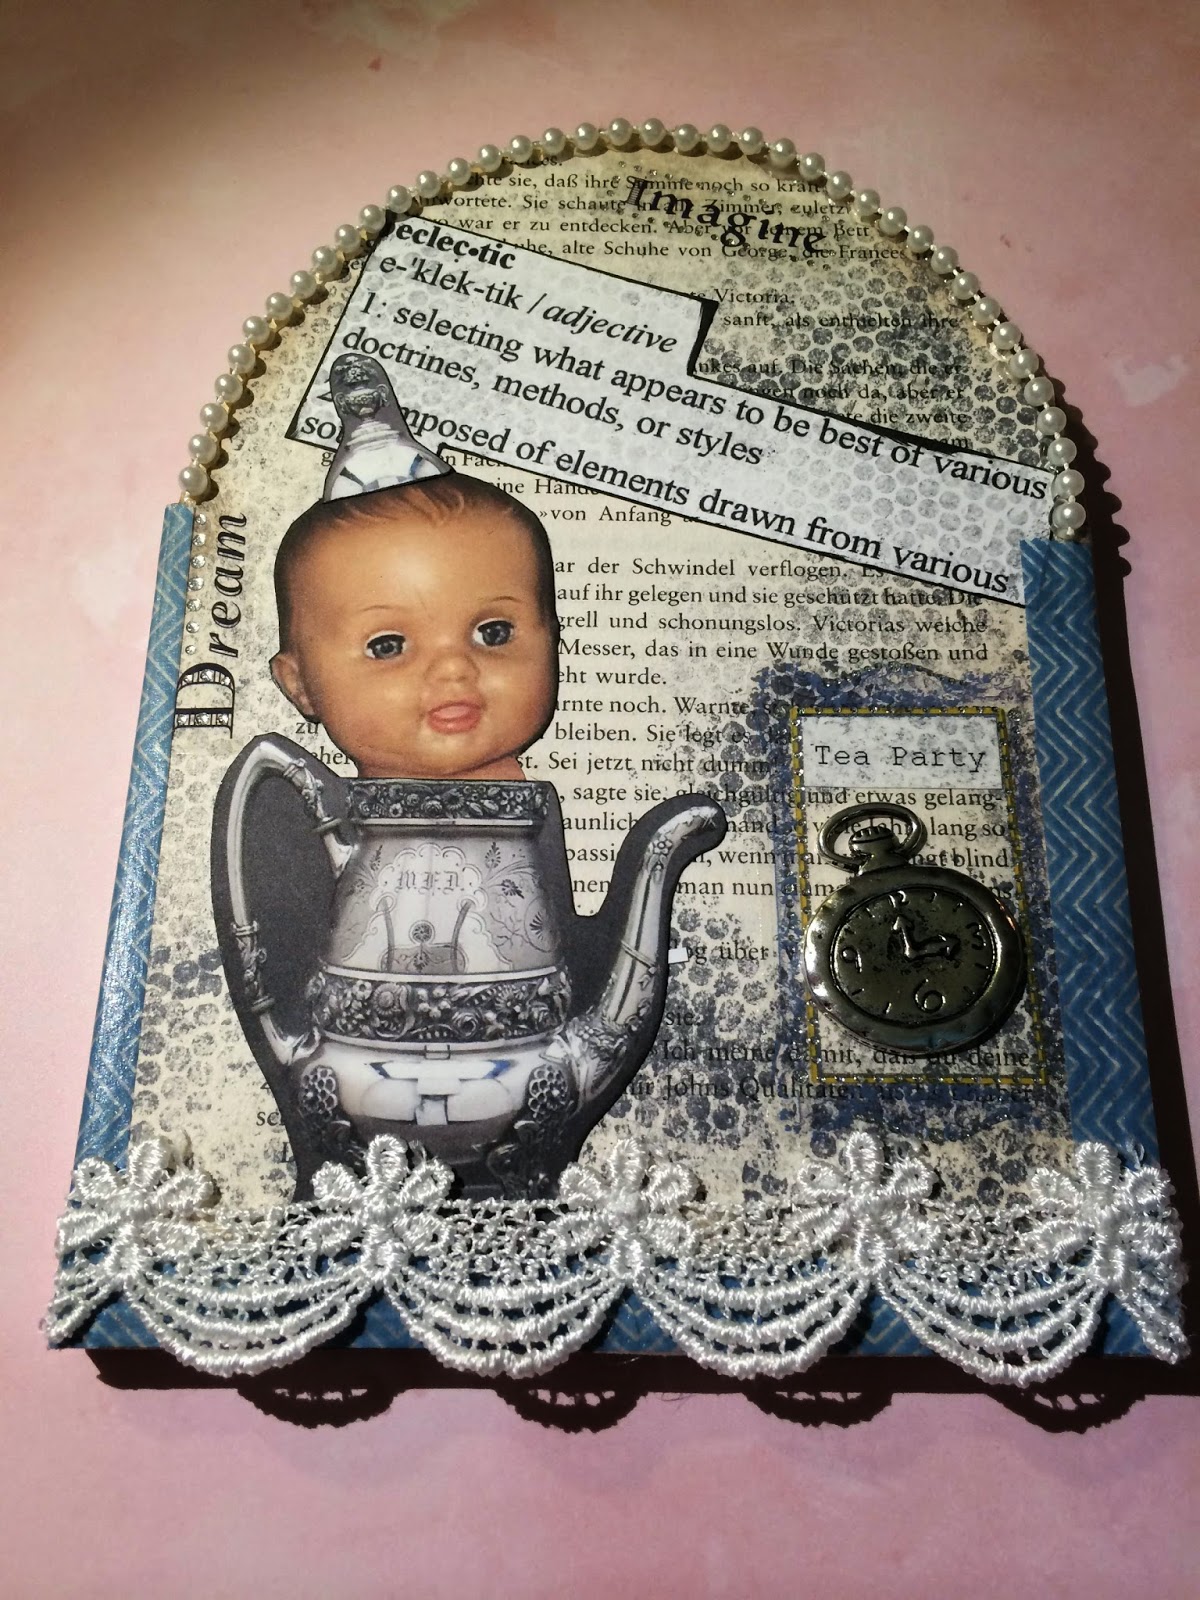
Today on the blog I am giving a sneak peek into a little Trending Tuesday fun. Most of you know that the Altered Pages Design Team has a monthly Trending Tuesday special post and I am preparing for mine. This months theme is, well, can you say multi-tasking? We are cross promoting with two other amazing groups. We are working with Unruly PaperArts and  Leaky Shed. The oh so fun theme is teacups and tiaras along with Moo's. How fun, right?

As I said this is just a peek, so you check back on Tuesday for all the amazing art brought to you by the Altered Pages Design Team. I am creating a board book and I took the cute teacup theme and turned it a bit on its side.


 Blank board book.


Board book with text page, distressing with ink and stamping to add dimension.


A little collage magic with...um... yeah, a baby popping out of an English tea urn. 


Some fun with ephemera, washi tape, silver charms and trim, etc. 

Be sure to check back Tuesday for more pages added to my One Lump or Two Altered Board Book. 

Here are just a few of the items used. Make sure to check out Altered Pages for all your craft and art supply needs.

Arched door board book

My head is spinning baby doll collage sheet

Tea Party Flowers collage sheet

Pocket Watch Charm

Thanks for stopping by.
Have a great weekend and Happy Easter!
Steph S.

Friday, April 4, 2014

Explosion box follow up

Hello and happy almost Saturday! 

I have for you today a follow up to the blog post from a couple weeks ago regarding the springtime explosion box. As mentioned a couple weeks ago we had an Altered Pages party hosting a class teaching all about explosion boxes. I can report that the class was a hoot, seriously we had a blast! We all had a great time and some wonderful explosion boxes were created. Here are some photos to give you just a peak. 

Altered Pages is teaming with Leaky Shed Studio's  and this month we are working with Tea cups and tiara's. In keeping with this months cross promotion I incorporated a sweet little decoupaged tea cup as the center piece of my creation. You can see that here. 


 This is an explosion box made by a class participant. She added paper flowers and metal charms to her "Explosion".

In the photo below I decoupaged some pretty tissue on to the Leaky Shed tea cup as mentioned above and later adhered it to the center of the box as part of my explosion.


Here you can see the bottom and middle layers. Who doesn't love a little bingo inspired paper!? 


In this photo below you can see tags that were made to add to the explosion box. These could be used as a sentiment or a base for photos if you choose to use this as a mini photo album.


This is the decorated lid to my box...the all important tool to keeping the whole project all in one piece. I adorned mine with silk flowers, giant gems, tulle and lace.


Here in the photo below you can see two finished pieces.  We had so much fun at the Altered Pages Party. Fortunately there will be many more to come as folks could not get enough!


In this photo below you can see the multiple tags made from left over scraps from the explosion box main pages. These are so fun to add into the little tag pockets...all made from the left over "scraps".


Projects used are as follows:


Here are simple instructions for making your own explosion box. 
Check out the Mailbox Muse for detailed instructions on making your very own explosion box. Can you imagine this technique done with a mermaid, merman or OMG... merchildren theme. Please order your Mailbox Muse kit now in order not to miss any of the ocean fun! 


As promised...please find below the instructions below for making your very own explosion box.

Please read all of the instructions before cutting or scoring.  The steps are important & should be done in this order to ensure that your box & the very important lid work properly.  With that being said, it is just paper so if you make a mistake no worries, just start over.
 
INGREDIENTS:
(3)  12 x 12 pieces of cardstock.    
(1) additional piece of cardstock for the box lid that is at least 8 x 8. This will now be referred to as the lid at all times in the instructions.   
Cutting tool & scissors
Score Pal with bone folder
Ribbon, trim, silk or paper flowers, photos, tags, glitter & other misc. embellishments, etc.
Corner rounder
Double sided tape, tape runner, glue, glue gun, etc.

BOX CONSTRUCTION:
Choose which 12 x 12 sheet you want for the base of your explosion box, then the middle layer, followed by the top layer. Take the piece that you have chosen to be the middle layer, cut the top & right sides down to 11 3/4 x 11 3/4.  Next, take what will be the top layer, cut the top & right sides down to 11 1/2 x 11 1/2.  You now have a 12 x 12 page, an 11 3/4 x 11 3/4 page & an 11 1/2 x 11 1/2 page.  
Starting with the 12 x 12 page, score at the 4 inch mark, rotate the page & score again at the 4 inch mark. Repeat this process on all 4 sides.  Your page should look like a 9 square grid.  Repeat this exact process with the 2 remaining pages of card stock.  DO NOT do this to the lid.
Next, cut out the four corners of each sheet on the score lines.  You should now have three pages of card stock that form a lower case letter “t” or a cross.  Use your corner rounder to round all of the edges on each of the large sheets.  Fold your pages on the score lines & set these aside.  
LID CONSTRUCTION:
Take the paper you have selected to be the lid (at least 8 x 8) & cut the top & right sides down to 7 1/8 x 7 1/8.  Score this sheet at the 1 1/2 inch mark.  Rotate the paper & score again at the 1 1/2 inch mark. Repeat this process until all four sides are scored.  Cut the right side of each corner piece on the score line.  Stop when you get to the intersecting score line.  Only cut the right side of each corner.  You should now have a little flap at each corner.  Fold all the edges on the score lines.  Take the little corner flap, turn it in & up.  Add double sided tape to the outside or the front facing side of the flap & connect it to the edge next to it, just to the right of the flap.  Repeat this process on the remaining three corners. 
CREATING POCKETS:
Decide where you want pockets for tags & photos.  The pockets should only be placed on the outer flaps & not the center squares.  Trim the scraps down to size if necessary.  Apply double sided tape to the bottom, left & right edges only of the back of this scrap.  DO NOT apply tape to the top edge.  This needs to remain open to create the pocket opening.  Attach your scrap to create the pocket. 
 BOX ASSEMBLY:
Start with your 12 x 12 base. The side that you want visible when the box is closed should be facing down.  Use a strong double sided tape or adhesive & apply to the middle square ONLY.   Attach the 11 3/4 x 11 3/4 layer directly on top of the 12 x 12.  Now, add adhesive/double sided tape to the middle square of the 11 3/4 x 11 3/4 page & attach the 11 1/2 x 11 1/2 directly on top of that.  You should now have three attached layers of card stock that form a lower case letter “t”, or a cross, all connected together by the middle squares only.  The four outer flaps should all be independent of each other.  Now that all pieces are connected you can decide how you want to treat the center.  You can create a “centerpiece” of flowers that literally explode open when the lid is removed.  You may want to add dimensional bobbles or charms, such as an Eiffel Tower depending on your theme.  You can leave the center empty to be able to use this as a gift box & all of the tags you created can act as little cards to go with your gift.     


For more fun kits, classes & inspiration visit
&


Tuesday, March 25, 2014

Trending Tuesday Butterfly Tag

Hello there!  Welcome to Trending Tuesday.  The Altered Pages Design Team has a fun little excursion for you through stencils and collages.  This is the "trending" theme for today's hop.  I hope you have fun checking it out.  Make sure to stop at everyone's blog to see all the great examples that they have created using stencils and collage.


I have made a butterfly tag for you today.  I used the 6x6 Daisy Cluster Stencil and butterfly collages for my main theme. I also used Gelatos in the "Tropical" color family, a fun little stamp, turquoise beads to create dimensional flowers and UT embossing powder to give it a morning dew type of effect.


You probably are getting used to hearing us talk about our Gelatos...everyone just loves them and I am no different.  Here I used a very small amount of my Snow cone and Watermelon Gelatos.  I added a tiny bit of water to soften it just a touch.  I then simply used my finger over the Daisy Cluster stencil to add the paint.  
 

I stamped, in black Staz On, the "Altered" stamp.  I fussy cut my butterflies and mounted them with dimensional double sided squares.  This was an easy way to get the effect of them flying over the tag surface.  
   

I stamped the tag and butterflies randomly with clear embossing ink and embossed with clear UT.  All that was left was to add the flower bead accents and ribbon.  And, here is the finished tag.  I think this would be a cute little addition attached to a Springtime wreath, gift basket or gift bag.  


Be sure to get all your supplies at  Altered Pages.  You can find the specific supplies used in this post at the links below.  Thanks for stopping by!  Stephanie 

Butterfly Collage
Tropical Gelatos
Dimensional adhesives

Sunday, March 23, 2014

Explosion Box WIP


That moment when you realize it is FRIDAY! Yes, oh yes!

This weekend has exciting things in store and therefore today's post is going to be short and sweet and will showcase a work in progress. This is a WIP as it is going to be taught this weekend at an Altered Pages Event at Vintage Bliss, in Gilbert, AZ. I will be teaching a class on how to make an Explosion Box! 


I love this project because the possibilities are endless. It can be a totally fun greeting card. It could work as a vessel for gift giving or even a self contained mini scrap book. I am 100% for sure making these for just about every holiday...can you imagine Halloween?!?!


I will have a follow up post showing the finished project, pix of the gals having fun making it and all the instructions for you to make one of your own.


For now, I have attached a bunch of teaser pics of the beginning process. We will be adding many layers of embellishments as well as plenty of pockets for cute little tags that can include photo's or little stamped or hand written messages. We will be adding (to name just a few) collage images, crepe trim, seam binding,  ribbon, pearls, charms and just about anything else our pretty little hearts desire. All supplies are available at Altered Pages, of course.  

I hope you enjoyed the baby stages of what is sure to be a blast of a class this Saturday! I promise I will post the end result and all the fun creating it. Have a GREAT weekend...I know I will.   ~ Stephanie


Friday, March 7, 2014

Dreaming of Spring


It's finally Friday!  I know I'm glad that the weekend is just about here.  I'm also glad that next week is Spring Break for my kiddos. So we will be out and about having some fun. 

The Altered Pages Design Team is partnering with Robin's Nest and the two teams are coming up with some fun and imaginative art for you. The thought of warmer weather, fun in the sun and and all these Springy lovelies from Robin's Nest and Altered Pages that are sitting out on my desk put me in the mood for an over sized Springtime tag. 


The background of my tag was made using my turquoise and yellow Niji Oil Pastels. You can find them here. I love how easily the oil pastels blend. I just used my finger to smudge and blend as I went along...super easy. I did add a bit of crackle finish over the top of that and it gave it a neat finish. I rather like it. 


I then began adding layers of torn paper from The Robin's Nest. You can find this oh so pretty pink paper here. I then added a bit of Glitz crepe trim in yellow and a cute little duckling collage image. You can find the yellow crepe trim here and the Springtime collage image here.


I then HAD to add some twinkle. Dew Drops are perfect for this. I added one to the tip of the umbrella and the inset of a flower. I also added them to the crepe trim along with a little scrap of yellow baby ball fringe. You can find the dew drops here. Robin's Nest has every color dew drop imaginable and they even have diamond shapes...so pretty. 


I added a bit of turquoise glitter ribbon for an extra pop of sparkle. Next, was just to finish it off with some ribbon for hanging and done! I'm not sure if this will be given away attached to a gift maybe or kept and incorporated into an Easter display. I have time to figure that out...wait, did I just say that out loud? 


I wanted to show you that I also decorated the back as well using more glitter paper from Robin's Nest as well as their cute butterfly glitter stickers. They also have the cutest rub on's. It made it so easy to add a sentiment to the tag. I have to say that I have worked with a lot of rub on's and these really are awesome! The package came with a popcycle stick so I did't need to grab any other tools. The best part was it actually worked...the first time...without fail or missing sections of lettering. I really love the Robins Nest "rubon". You can find them here.  You can see a couple other colors (blue and yellow) of the glitter paper in the backdrop of the pictures I have taken.  


All ready to give away...if I don't decide to keep it. ;-) 

Happy Friday and Happy Spring, almost! 

Stephanie

Monday, February 24, 2014

Two for Tuesday - Techniques


Welcome to my project for the Two for Tuesdays with the Altered Pages Design Team. 

Maybe you've already heard...this time around the Altered Pages Design Team is sharing techniques using specific products rather than a concept or theme. I am definitely looking forward to seeing what we all come up with. The products we are focusing on are Dylusions, Gelatos & collage images from Altered Pages. I also added the Andy Skinner Baroque stencil. I hope you enjoy!


I chose to create a watercolor painting for today. I have many mediums that interest me, but watercolor is where my heart is. This is "She".


I created She on watercolor paper & made the background with my Gelateos in Guava, Lavender & Bubble Gum. I used my handy waterbrush for the background as well. I then splattered & dripped a bit of After Midnight from Dylusions. From there I used the Baroque stencil & created the shadowy look by stenciling first with my Staz On ink pad in Cloudy Sky. I then moved the stencil just a bit down & to the left & then stenciled again using Staz On in Jet Black. I used Staz on here as I new the piece was going to be manipulated still with water & water based inks & I DID NOT want her to fade or run. 


Next, I grabbed my After Midnight ink again & put one or two drops in my paint palette. I added a few drops of water to thin it a bit. I then starting making drastic & elongated eyelashes around each eye with a fine liner watercolor brush. I repeated this process with my Funky Fuchsia Dylusions ink. I wanted a bit of definition so I added black with my Micron pen & a bit of white with my Uni-ball white gel pen. 


To finish I mounted the piece on black card stock and included a vintage ATC collage image to the back to add the title, my info & date. 


I hope you enjoy the projects today. I also hope you find some inspiration to create something of your own. When you do make sure to visit Altered Pages to pick up everything you need for supplies. 

Thursday, February 20, 2014


Happy Friday!

Welcome to the blog today. The Altered Pages Design Team is very fortunate to be working with Niji and Yasutomo for the month of February. Please take a minute to take a look at their sites. There is great inspiration as well as tools for all of your art and crafting needs at both locations. 


Today I am showing you a cute little bird I created to sit atop an altered book I have been working on. The book had its own theme going on, but it needed something to be the focal point. So, with a little sparrow shape that I cut out of card stock and vintage text pages I have just what the book cover needed. The book is a salvage piece from a law firm move. They were recycling literally thousands of books and I grabbed as many as my hands could carry and by hands I mean the back of my SUV. SCORE!  The book itself was painted out with acrylics achieving this fun icy blue, green. I then dripped it with liquid black acrylic and then added in the fun graphic poppies.  

To start I sketched out a bird shape on to a scrap piece of card stock and then cut her out. I then basically made individual templates of vintage text pages, one for each wing and one for the body. I used three different text pages to differentiate the "body parts" I needed. I did antique them a bit with my Paris Truck Parchment ink pad.


From there I kept assembling her pieces and added a couple more wings with washi tape. I also used my  Script washi tape tape to create her beak. 


I then went to my trusty waterbrush and metallic watercolor palette to add a bit of shimmer and shine.  I gave her a little twinkling eye, then attached her to the top of the book and viola!


Friday, February 7, 2014

What's on your work space?


Happy Friday Kids! 
Stephanie here again with your Altered Pages Friday post. It's Friday. It's Friday! Yay! As always, be sure to check out the supply list below along with links to amazing deals at Altered Pages.


Can I just tell you in my art lately I have wanted to give myself the freedom to let things happen, let the art just flow, not worry if it was going to be perfect or not. I have a feeling most of you know what I mean. You too have probably said to yourself at one time or another just go with it. Haven't you? Haaaaaaven't you? Okay, so let's go with it.  


While preparing for what I wanted to do for my post, trying to work in this just go with it/freedom theme, I got the idea to only use what was already out on my work space in my studio. I thought I would just let the pieces talk to me as to where they were going and what colors they wanted to be. 

If you are like me you always have a few little stragglers left out from your last project. Oh, wait, this NEVER happens to you? Okay, me neither. Today, I got lucky and there were a lot of great options lying around, party hat collage sheets, Dylusions journal, tags, Dylusions inks, stamps...
do you get where I am going.


So, I grabbed these cute little tags that I had laying about and thought a moon with wings - LOVE IT! Then, I thought a moon with wings and a party hat - even better! Ideas started flowing, colors started moving to the forefront of my mind and I let it happen. It felt great. To be honest this page just developed as I came across each element - one at a time - a little of this a little of that and I think that is what makes it great.


I did all of this with what was already within arms reach. Obviously, it helps that I have a great source for all of my supplies in Altered Pages. The best part is I just let myself be free & I worked with what was in front of me. I was not worried about this being "the perfect page" and I have to say it works!  


In the end I am rather pleased with my little moonflies fluttering about in their party hats. It's a little, okay a lot, whimsical. I love the looseness of it. I love that I only used what was on my desk and I LOVE that I love it. The plan worked...how awesome is that? 


Here are links to just a few of the amazing things Altered Pages has to offer.
Dylusions Journal - lg.  Collage images Waterbrush  Dylusions inks  Assorted Tags and so much more!


One thing I want to mention when working with Dylusions inks they are water based. This is what I love about them. They have play. They are wet, stay wet for a while and can be reactivated with water. 

If you want certain aspects of you piece to be permanent just use an archival ink pad, a Zig pen or your favorite permanent such as Brilliance Ink Pad in black. 

Another little tip, if you want your pages to be pristine just gesso the back before starting a new page.

The back side of this journal page does show some bleed through.
I usually let that be the background for the next entry.

When I don't, though, I just apply a thin coat of gesso to the page, let dry and then give it a go.   Now, go play with your arts & crafts supplies!   Stop by 

AlteredPages.com for all your supply needs.
Happy crafting!