Friday, October 21, 2016

Altered Tin With Surprise Giftie Inside

Hi guys!  I have a fun little altered tin for you today.  I think this just makes the cutest gift and I already have a friend in mind to give this to.  She LOVES Halloween about as much as I do, so I know this will be a hit.


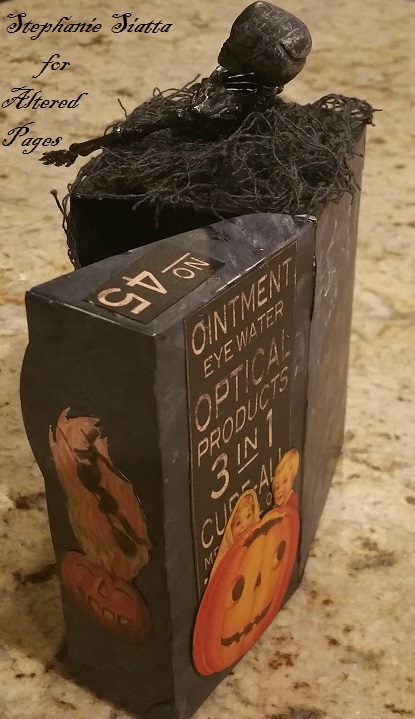
I began using a tin from Altered Pages that you can find here.   I added vintage text paper, a fun pumpkin collage and some ribbon and twin to cover the tin.  I really love the Gothic Lace Stickers that you can see here at the top and bottom of the tin.  They are a wonderful textural element and so easy to use.

Next, I added vintage black cat images to bottle caps using Crystal Lacquer.  You can find all sorts of wonderful Halloween images here.  The Crystal Lacquer was used under the image to adhere it to the bottle cap and again on top to create a resin type look over the top of the image.  Crystal Lacquer is self leveling so that makes it great for this application and it doesn't take over night to dry...Bonus!

    
And, I added a little charm bobble at the bottom for some extra fun and glimmer.
These skull charms would be awesome too!

I added a bit more Crystal Lacquer to the pumpkins eyes to give them a little extra umph.  I didn't really want to use the word pop seeing as these are eyeballs that we are talking about. Ew!  ;-)


I then added a little gothic label to the back so I could sign and date my creation.  When able, always sign and date your art or craft project...you never know what journey your works will take and whose hands they will end up in some day.

Here are a few more shots... Can I Just say...look at that beautiful background paper.  That is from the lovely line of Sabor Papers that you can find here.


Please join us all month long as we show you how to alter boxes, tins, bins, etc. 
Thanks for stopping by!   Stephanie Siatta for Altered Pages

Here is a list of supplies used for this project.
Halloween Collage Images
Metal Tin
Bottle Caps
Bottle Cap Clear Dome Stickers
Misc. Ribbons and Trims
Crystal Lacquer
Vintage Text Pages

Friday, October 7, 2016

Tea Bag Box or Vintage Crypt...you decide

I am so excited for October to finally be here.  That means cooler temps in the desert and Halloween décor!  Halloween is my absolute favorite time of year to decorate for.  I guess I love all things creepy. 


This month the Alteredpages.com Design Team is altering boxes.  Boxes of all kinds and shapes.  I think this is gonna be fun!

I began my project with a cute little box that tea bags come in.  We have all seen these and I don't know about you, but I HATE recycling them.  I am always trying to come up with something cute to do with them, well, I decided to turn the cute little lemon ginger tea box into a vintage creepy crypt! 

This is how things started...

And, then with the addition of black and cream craft paint the cardboard box became a stone grave.


(I hope you saw Trisha's project yesterday, but she also altered a box.  Her variation involved a baseball card box transformed into a tea bag chest and boy was I impressed.  We must have been channeling our inner tea time recently.  You can see her post HERE.


Next, I began adding a bit of gothic cheese cloth, scraps of floral paper and adorable vintage collage Halloween images.  Specifically, I used images from Halloween Horribles and Happy Halloween collage sheets.   I also added bits from the Optical Odditites Old Curiosity Shoppe 12 x 12 paper from Graphic 45


You can see in the pic above how I toned down the floral images.  I used the same black and cream craft paint...just watered down quite a bit.  I brushed it on and smeared it with my finger tip to get an aged, not so vibrant look.
I also added a bit of vintage text page on the back of the crypt.  If you follow this blog, you already know that I incorporate vintage text or music sheet into so many of my projects.  It is versatile, adds interest and it is easy to work with.

Next, I added a fun little plastic skeleton (from the dollar store) to the top of the crypt.  He looks like he is emerging from his tomb.  He was added with a dab of hot glue where everything else was adhered with the ever versatile Aleene's Tacky Glue. 


Check back for the remainder of the month to see all the amazing box transformations we come up with. 


Thanks for stopping by!
Steph S.