Friday, December 23, 2016

Double Duty Holiday Blocks

Happy Eve of Christmas Eve!  

I love this time of year.  I know it can get crazy busy, but there is just something magical in the air, IMHO.   

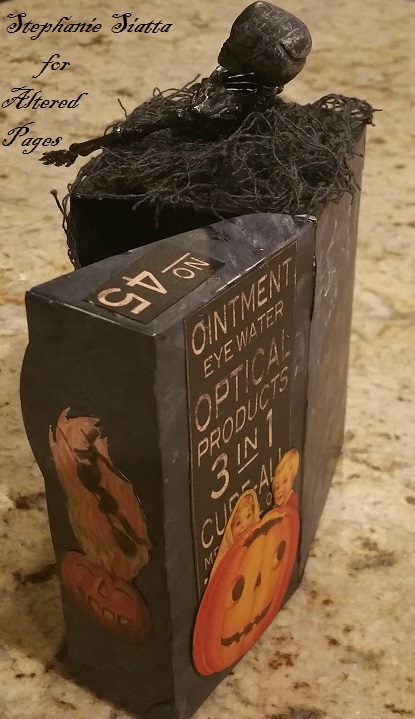
I wanted to make one more handmade gift over the last week or so. So, I decided on an ATB (Artist Trading Block) project.  
This is a great double duty gift.  By that I mean it can be displayed with all of your Christmas decor and continued to be loved until VALENTINE'S DAY! Yes, just rotate the blocks for a whole new look.  This is an all skill level project as well - bonus! 

With Altered Pages carrying everything you need from kits to embellishments, this is easily completed in a few hours (including drying time). 


In the above picture you can see that my blocks have been painted black using craft paint - you can use whatever color, sheen or finish you desire.  
Choose your background paper.  With your block as a template, cut paper to size.   I inked the paper a bit with a black ink pad.  Don't worry about being precious with this...go ahead get inky.  I think it adds a lot of charm.  

Give each block a bit of a sand or a lot of a sanding if you want more distress. Then add a coat of Tacky Glue or matte medium to the front of your block to decoupage and add your paper.  


Seriously, already come the final touches...letters, embellishments, etc. and you are almost done.  Altered Pages has so many papers and images to choose from.  Choose the digital collage option and you can easily resize to fit your needs.   Here is one... 


The JOY letters that I used were from a rich red paper that was run through my Silhouette.  I then added a few fussy cut holly berries, red, green and white twine and a few other details. 
Now, flip those blocks around and....
My LUV letters were printed on vintage text page run through my printer.  They were then glued to my base paper.  I used an embossed Kaiser Craft 6x6 paperpack.   Can you see those sweet little hummingbirds?  


With letters or images adhered to blocks with charms, crowns and wooden treats for extra sweetness you have a sweet homemade gift that can enjoy the spotlight for more than just one holiday.  


Flip side...

Thanks for stopping by.

I am honored to be included with this 
inspiring group of women and artists. 


I wish you all a very 
Merry Christmas, Happy Hanukkah, Happy Kwanza. 
~Stephanie 

Supply list...
Glitz 6x6 paperpack - Hello December  this was used for the chevron Joy background. 
KaiserCraft 6x6 paperpack - Hummingbird  this was used for the pink LUV background

Friday, December 2, 2016

Many Uses Vintage Christmas Tree

Wow, December 2nd...how is this year almost over already?!?!  It truly is crazy how time flies, well, I guess it is easy to see that times flies when you are having fun creating.  That is what I have been doing lately, with the help of Alteredpages.com.  I actually had a little help this time around from Diydesignstudio.com as well.  Scroll along and see what I came up with. 


I grabbed one of the adorable wood and chicken wire trees from DIY Design Studio and gave the entire tree a coat of craft paint in purple
I then gave it a light dry brushing with chalk paint in cream.  The tree is 15 inches tall and makes a wonderful statement piece.   


I then gave the entire tree a bit of sanding to distress it and reveal the wood grain below.    I also added two coats of Dixie Belle satin clear coat sealer  from DIY Design Studio.


 Next, came embellishments consisting of lace, cup chain, jewelry pieces, beads and crystals.  
All embellishments were added using Crystal Lacquer.


The crystals and jewelry pieces came in a great jewelry pack full of all sorts of
goodies.  You could use rustic colors and embellishments too.   Maybe include wooden ornaments or beads.


I finished the piece by wiring the crystals and beads onto a beautiful trim. 
I also added a skeleton key that I had in my stash.
You can coordinate any colors to match your theme. 
I attached the trim to the back of tree where you won't see the mechanics of it.


These trees are a great starting base for many cute projects.
You could add mini clothespins to attach your Christmas cards  to the chicken wire and how cute of a display would that be?  You could choose white on white on white for a shabby look.  Metallics are always a great color choice for Christmas crafts.   They even come with a jute hanger already attached.


You can find everything you need at Alteredpages.com.

Thanks for joining me.
Have a great weekend!
~Stephanie


Friday, November 18, 2016

Watercolour Fall Foliage Tag

Happy Friday, gang!  We made it!  Another week tackled, yay us!!

Now, for some crafting fun.   Today, I have for you a "mostly" quick fall foliage tag that would make a great addition to a hostess gift or greeting card.  And, we all know there is an endless need for those quick little gifties this time of year. 


I am keeping with my trend for this month and that is water colour. In my post a couple weeks ago I decided to get back to what I truly love and that is painting with watercolours making a pointsettia tag. And, here that is below.  
I am keeping with that trend today.  And, you will see that both of my posts involve tags.  I think most of us love tags because the size makes them manageable. Even if you want to get really intricate a tag is still a type of project that can be completed in an hour, an evening, etc. 

Let's get going.......
I began with a page from my Dylusions Journal. Did you know you can just create on that wonderful paper and rip that page right out of your journal to use however you want?   Yes, you can.   And, for some of you wondering, no, this is not 300 pound cold pressed watercolour paper.  However, for this application it is just fine. 
 So, I began with a quick sketch. 
Don't be too heavy handed as you will 
need to erase most of your pencil marks 
so they don't show through your final image. 
Then, begin applying your watercolour.  

Give your image some dimension by adding darks and lights. 


Next, I choose the tag/s.  These were tags where the background was previously created with the forethought that they would someday be used for something great.  The green tag was done with multiple shades of mists and inks after "wrinkling" the tag


The amber tag was created with multiple shades of golds and amber ink pads applied directly onto the tag.  You can see that there is also a stamped image of the Eiffel Tower...sorry today we only need the background.  Paris, you will have to wait. 

I then adhered the green tag to the gold tag using 3/8 inch double side tape.  I added a few pieces of beautiful ribbon fibers and seam binding that I dyed with coordinating inks.  Next, came attaching the fall leaf to the tag.   I did this by applying Zig 2 Way Glue Pen to the back of the leaf.  This makes those small intricate cuts adhere perfectly.   

Attach this beautiful tag to a wine bottle, tea towel or gift basket and you will certainly convey how Thankful you are for your Holiday Hostess. 

I hope you enjoyed this little tag!  I 100% enjoyed playing with my true love, watercolour, in a quick way that tackles multiple uses. Gotta love painting therapy for me 
and a hostess gift for someone special.  
Thanks so much for joining me.  
Stephanie Siatta 
for the
Altered Pages Design Team

Here is a quick supply list....

Friday, November 4, 2016

Getting Back To My True Love - Watercolor

Well, Hi there! 

Welcome to the Altered Pages Blog.  I am happy you stopped by.   This month the Design Team will be focusing mostly on the Holidays coming up.  Today, I decided to combine that goal with a medium that I truly love...watercolor.  I love all types and styles of art, but when it comes to making my heart happy I love to paint and watercolor is my medium of choice for painting.  It is definite therapy for my soul. 


So, I whipped up a quick Poinsettia tag that I can incorporate into a card, gift bag or mixed media project.  Here it is...I hope you like it. A supply list will be at the end of the post. 

I started with an oversized tag and used a mossy green and truffel Salazar ink to colorize the background.  Then, I sketched my basic outline of a poinsettia.  
Next, I started layering my watercolors...and layering and layering. 
   
Once I was happy with all of the lights and shadows I added some pretty ribbons and it is ready for its next phase.  I am not sure what that will be, but it will be perfect for adding to a hostess gift or card.  I can stamp on it or just sign and date it.  We will have to see...
I really love the watercolor kits that Altered Pages has.  I always keep a sketch and paint kit ready to go when traveling or if I know I am going to have some time on my hands.  I can grab a little journal or a tag, get out my watercolor pencils, a couple water brushes and I am ready to create.  I also love the AP logo canvas tote. It is large enough to hold all of my goodies and sturdy to stand the test of time. 

Thanks again for stopping by.  Please leave me a comment so I know you were here.  Be sure to check back all month long and see what we have up our sleeve next.  
~Stephanie 


Supply List - 
Alteredpages.com
Mixed Media Salazar Iinkx - Mossy
Mixed Media Salazar Inkx - Truffle
Watercolor paints, inks, etc.
Watercolor Pencil Tin
Watercolor Pencil Mini Set
Aqua Flo Water Brushes
Waterbrushes
Pipettes
Tag
Ribbons and Trims
AP Logo Canvas Tote

Friday, October 21, 2016

Altered Tin With Surprise Giftie Inside

Hi guys!  I have a fun little altered tin for you today.  I think this just makes the cutest gift and I already have a friend in mind to give this to.  She LOVES Halloween about as much as I do, so I know this will be a hit.


I began using a tin from Altered Pages that you can find here.   I added vintage text paper, a fun pumpkin collage and some ribbon and twin to cover the tin.  I really love the Gothic Lace Stickers that you can see here at the top and bottom of the tin.  They are a wonderful textural element and so easy to use.

Next, I added vintage black cat images to bottle caps using Crystal Lacquer.  You can find all sorts of wonderful Halloween images here.  The Crystal Lacquer was used under the image to adhere it to the bottle cap and again on top to create a resin type look over the top of the image.  Crystal Lacquer is self leveling so that makes it great for this application and it doesn't take over night to dry...Bonus!

    
And, I added a little charm bobble at the bottom for some extra fun and glimmer.
These skull charms would be awesome too!

I added a bit more Crystal Lacquer to the pumpkins eyes to give them a little extra umph.  I didn't really want to use the word pop seeing as these are eyeballs that we are talking about. Ew!  ;-)


I then added a little gothic label to the back so I could sign and date my creation.  When able, always sign and date your art or craft project...you never know what journey your works will take and whose hands they will end up in some day.

Here are a few more shots... Can I Just say...look at that beautiful background paper.  That is from the lovely line of Sabor Papers that you can find here.


Please join us all month long as we show you how to alter boxes, tins, bins, etc. 
Thanks for stopping by!   Stephanie Siatta for Altered Pages

Here is a list of supplies used for this project.
Halloween Collage Images
Metal Tin
Bottle Caps
Bottle Cap Clear Dome Stickers
Misc. Ribbons and Trims
Crystal Lacquer
Vintage Text Pages

Friday, October 7, 2016

Tea Bag Box or Vintage Crypt...you decide

I am so excited for October to finally be here.  That means cooler temps in the desert and Halloween décor!  Halloween is my absolute favorite time of year to decorate for.  I guess I love all things creepy. 


This month the Alteredpages.com Design Team is altering boxes.  Boxes of all kinds and shapes.  I think this is gonna be fun!

I began my project with a cute little box that tea bags come in.  We have all seen these and I don't know about you, but I HATE recycling them.  I am always trying to come up with something cute to do with them, well, I decided to turn the cute little lemon ginger tea box into a vintage creepy crypt! 

This is how things started...

And, then with the addition of black and cream craft paint the cardboard box became a stone grave.


(I hope you saw Trisha's project yesterday, but she also altered a box.  Her variation involved a baseball card box transformed into a tea bag chest and boy was I impressed.  We must have been channeling our inner tea time recently.  You can see her post HERE.


Next, I began adding a bit of gothic cheese cloth, scraps of floral paper and adorable vintage collage Halloween images.  Specifically, I used images from Halloween Horribles and Happy Halloween collage sheets.   I also added bits from the Optical Odditites Old Curiosity Shoppe 12 x 12 paper from Graphic 45


You can see in the pic above how I toned down the floral images.  I used the same black and cream craft paint...just watered down quite a bit.  I brushed it on and smeared it with my finger tip to get an aged, not so vibrant look.
I also added a bit of vintage text page on the back of the crypt.  If you follow this blog, you already know that I incorporate vintage text or music sheet into so many of my projects.  It is versatile, adds interest and it is easy to work with.

Next, I added a fun little plastic skeleton (from the dollar store) to the top of the crypt.  He looks like he is emerging from his tomb.  He was added with a dab of hot glue where everything else was adhered with the ever versatile Aleene's Tacky Glue. 


Check back for the remainder of the month to see all the amazing box transformations we come up with. 


Thanks for stopping by!
Steph S.